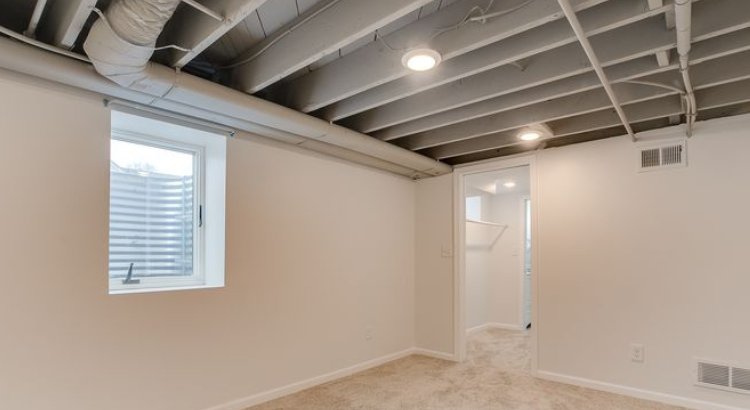
Starting the process of upgrading your open basement ceiling can revitalize the area, which is sometimes overlooked.
We’ll discuss painting techniques in this guide, “How to Paint an Exposed Basement Ceiling,” to help you achieve a polished and stylish appearance. We’ll easily handle every aspect of the procedure, from the necessary prepping to selecting the best paint and using expert skills.
Learn how to protect surfaces, add lighting, and arrange ceiling cables to make this transforming and satisfying do-it-yourself project. Let’s add some new style and imagination to your basement’s design!
Preparation Steps
Cleaning the Surface of the Ceiling
Start by giving the exposed basement ceiling a thorough cleaning. Clear the area of accumulated dust, cobwebs, and debris to provide a clean, smooth surface on which to paint.
Filling up Any Holes or Cracks
Patch up gaps or cracks in the ceiling to address any flaws. This important procedure guarantees a smooth and consistent appearance after painting, eliminating any visible irregularities.
Ceiling Wire Arrangement
Streamline and beautify the appearance of ceiling wires by neatly organizing and securing them to improve safety and aesthetics.
Cleaning the Joists in the Basement Ceiling
Pay further attention to the ceiling joists and give them a thorough cleaning and prep before painting them. This step guarantees a smooth finish and enhances the room’s general cleanliness.
Installing Lighting and Addressing Electrical Needs If Necessary
As needed, add overhead and electrical lighting to meet the basement’s illumination needs. The painted ceiling looks more attractive in addition to being more useful after doing this step.
Preserving the Floor and Walls from Paint
Take precautions to prevent paint spills and splatters on the nearby walls and floor. To establish a barrier that keeps the painting process neat and hassle-free, use drop cloths and painter’s tape.
Essential Materials and Tools
Paint Rollers: Select paint rollers of superior quality that are appropriate for the exposed basement ceiling’s surface roughness.
Paint Brushes: To ensure accuracy in your painting process, use a range of brushes for various areas and detailed work.
Drop Cloths: To prevent paint spills and splatters on the floor and nearby surfaces, use sturdy drop cloths.
Painter’s Tape: Use painter’s tape to create crisp, defined boundaries and avoid accidental paint smudges.
Primer: For the best consistency, make sure you have the right primer based on the kind of paint and the ceiling’s substance.
Paint Trays: For effective paint application, use paint trays to retain and spread paint uniformly.
Extension Poles: Use extension poles to extend your reach; they’re especially helpful for painting high areas and ceilings without the need for ladders.
Safety Gear: Put safety first while painting by wearing gloves, a mask, and goggles to keep yourself safe.
Stir Sticks: To properly mix paint and guarantee a constant color throughout the project, have stir sticks available.
Ladder: If you need to safely access the upper areas of the basement ceiling, utilize a robust ladder.
Selecting the Right Paint Type, Colour, and Techniques

Evaluate the factors that should be taken into account when choosing the type and color of paint that best suits the design of your basement. Recognise how different finishes and colors can affect how a room is perceived.
Examine efficient painting methods for exposed basement ceilings, such as roller and brush applications. Discover how to give the entire surface a uniform, polished appearance.
Installing Can Lights and Painting Ceilings
Adding can lights to your basement will improve its atmosphere and functionality. Know where to put increased lighting strategically and how to install it.
Think beyond the obvious as you explore innovative ways to improve the painted ceiling’s aesthetic appeal. Learn how to make the ceiling of your basement stand out with stencils and creative color schemes.
Possible Difficulties and Solutions
Imperfect Surfaces
- Challenge: Handling the uneven ceiling in the basement.
- Solution: Apply patching compound or filler after thorough cleaning.
Paint Splashes and Drips
- Challenge: Keeping spills under control while painting.
- Solution: Use painter’s tape, proceed with caution, and have cleanup supplies available.
Color Inconsistencies
- Challenge: Guaranteeing a constant paint color.
- Solution: Mix paint thoroughly; if at all feasible, use the same batch.
Texture Problems
- Challenge: Addressing the finish’s irregular texture.
- Solution: Try out various painting methods and textured paint.
Air Ventilation Issues
- Challenge: Allowing enough air to circulate while painting.
- Solution: Utilize fans, open windows, or add more ventilation.
Adherence Issues
- Challenge: Guaranteeing strong paint adherence.
- Solution: Make use of an appropriate primer and adhere to drying times.
Dangers to Safety
- Challenge: Take safety precautions, particularly when operating at heights.
- Solution: Put on the proper protective clothing, such as masks and goggles.
Cleanup Activities
- Challenge: Effectively tidying up the workspace after painting.
- Solution: Prepare cleaning supplies so that spills or drips may be cleaned up quickly.
Premature Drying
- Challenge: Preventing inconsistent drying.
- Solution: Give each coat enough time to dry, and keep the environment in good order.
Conclusion
To sum up, painting an exposed ceiling in your basement may be a very fulfilling project. Every stage leads to a striking result, from careful planning and tool selection to artistic additions and lighting setup.
Using our instructions to overcome difficulties guarantees a seamless process. Use the ceiling of your basement as the blank canvas for a chic, well-designed room. Accept the artistic license, follow safety precautions, and bask in the glory of a beautifully painted and improved basement.